About Me

Whitney

Follow Me on Pinterest
Powered by Blogger.
Showing posts with label Remodel. Show all posts

Tuesday, March 27, 2012

Basement Remodel

It only took us four years but my husbands "man cave" is on it's way.  Here are few pictures of our progress thus far.

Inspiration Photos


Before Shots 
View from the stairs. 

Another view.  Door to the garage.

Other side.  Door to the backyard.

First part of demolition- remove this wall.

And on the other side of that room= ugly fireplace

Backside of the wall to be removed.

PHASE 1 : Walls
Build wall at bottom of stairs- check!

Remove wall- check!  Say hello to my master carpenter aka father-in-law.  
He's sitting at what will become the bar.

PHASE 2 : Brick
The brick has arrived!
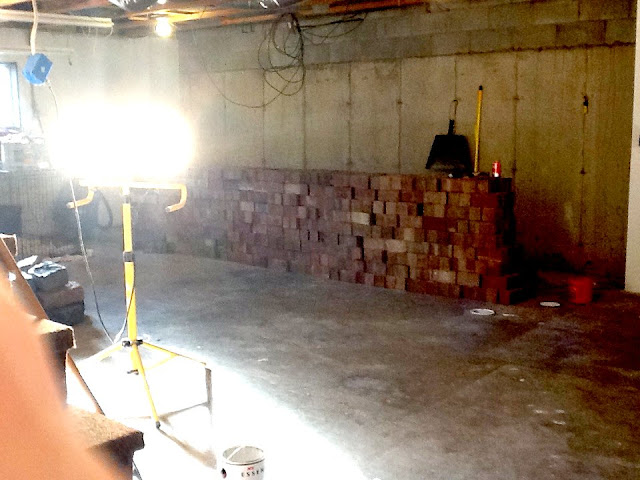
Ready to build the wall!

Wall is done!

Brick for bar base.

Bar done!

PHASE 3 : Stone
Before 
After
We used granite stones that we already had, leftover brick, 
and spray painted the existing fireplace screen.  
This fireplace only cost us the price of a few bags of mortar.  Nice!

PHASE 4 : Ceiling
Rough cut wood straight from the sawmill.  
Awesome way to have a wood ceiling at a fraction of the price!


PHASE 5 :  Bar Ceiling & Lights
We used corrugated tin sheeting to create the industrial look 
we were wanting and it also helped to break up the wood ceiling.  
We built cross beams and larger beams to frame in above the bar area.  
Lights were purchased online.

Still to come
Bar countertop & shelving (countertop arrives tomorrow!)
Paint & Trim (which is actually done I just haven't taken pics yet)
Fireplace shelving
Flooring
And, of course, decor!

Stay tuned.....

p.s.  I'm sorry my pictures are terrible.
I deserperately need a nice camera-
it also doesn't help that I take most of these pictures with my phone :(

Wednesday, March 14, 2012

Kitchen Facelift

I recently got a wild hair to makeover the kitchen.  Using all already existing materials and one can of white paint I went from

   THIS                       to                       THIS

Perhaps I should start by explaining that when we bought our house a few years ago the kitchen backsplash had been (poorly) painted white by the previous owners.  It was a truly pitiful white on white countertop combo.  (Who has white countertops??  I guess if you never plan on cooking they are a good idea<---talk about stain city!  But that's a whole other can of worms that I'd rather not complain about.) And in an effort to make the whole painting on tile thing better we had my husbands aunt who paints professionally paint over it again.  You follow?  I know, it's a whole lot of paint we're talking about.  Her work is what you see in the above picture to the left.  And to the right is how the original tiles looked after I stripped them of ALL the paint. Cobalt blue baby!  Ok, so here's what I did.

Starting with your standard paint stripper I applied a heavy coat to my painted backsplash.  And to my HAPPY surprise the paint starting bubbling right off.


(scrape, scrape, scrape away)

By the time I was finished I had applied two coats to every 'section'.  The first coat took off the majority of the paint and the second coat was to get whatever was left in the grout lines.  Above is what it looked like after the second coat.  Once everything was loose, simply clean with a brush, soap and water. Ta Da!

                               
Now what?  Oh yes, must accessorize and paint.
Placemats = World Market (clearance yay!)
Centerpiece = BB&B (clearance, double yay!)
Runner (that I am using as a curtain) = Target
Curtain Rod (not pictured) brand new Target = Goodwill

 (I added this b/c you can find excellent brand new Target items at Goodwill ---they have an exclusive deal with them- seriously this is no joke)
Quality paint- very important

I will post again when she's all done.  Stay tuned!  :)